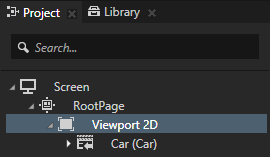
For example, select Viewport 2D that contains content you want to render to a texture.
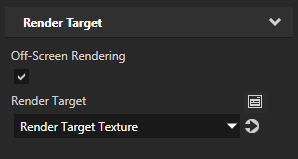
- Render Target to the Render Target Texture to which you want to render the content of the selected node.
- Off-Screen Rendering and enable the property.
- In the Project press Alt and right-click and select Empty Node 2D.
- In the Project select the Empty Node 2D node, in the Properties add the Background Brush property, and in the drop-down menu select <Create texture brush...>.

- Next to the Background Brush property click
 and set the Brush Texture property of the Texture Brush to the Render Target Texture you want to show in the Empty Node 2D you created in the first step.
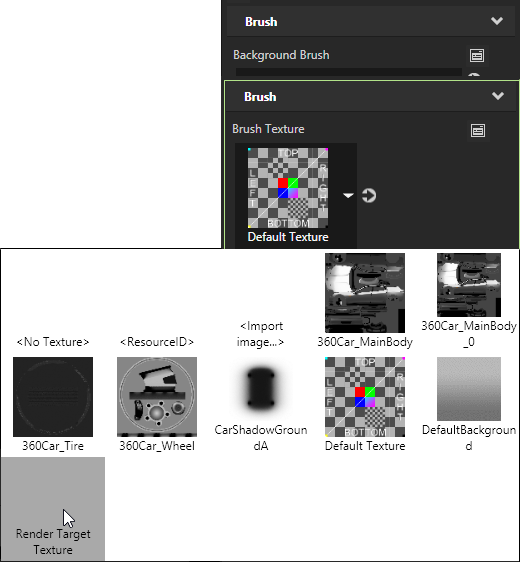
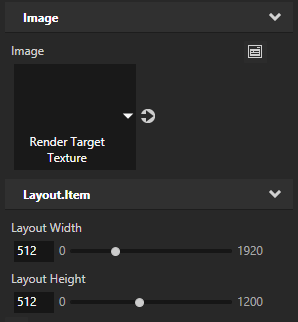
- In the Project select the Empty Node 2D, and in the Properties add and set the Layout Width and Layout Height properties to the size in which you want to show the content of the Render Target Texture.
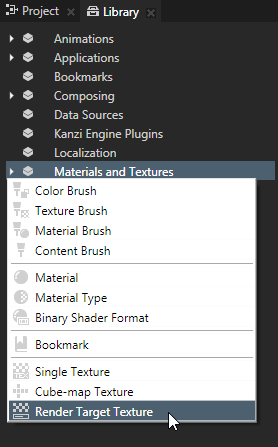
- In the Project press Alt and right-click and select Image.
- In the Project select the Image node, and in the Properties set the Image property to the Render Target Texture you want to show in the Image node.
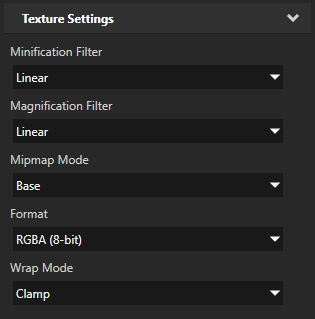
Usually the best starting point for setting texture filtering is to set:
- Magnification Filter to Linear
- Minification Filter to Linear
- Mipmap Mode to Nearest. If you are sure that the texture is not minified select Base, otherwise start with Nearest.
For example, the default value for a Render Target Texture is Base. With this setting, the texture does not have mipmap levels and the base level is always sampled.
If you set the Mipmap Mode property to Linear or Nearest do either of these:- In the Render Pass you use to render this texture set the Mipmap Level to 0 and enable the Generate Mipmaps property. With this setting Kanzi generates the mipmap levels.
- Create as many Render Passes as you have mipmap levels in the texture.
Set the Format property to the format you want to use for the texture. Because not all devices can render all texture formats, make sure that your target platform supports the format you select. For example, texture formats with a non-power of two pixel size are not always supported (RGB) while RGBA format is widely supported.
Note that some texture formats are available with OpenGL ES versions higher than 2.0. To set the OpenGL ES version, in the main menu select > and set the Target Graphics API property.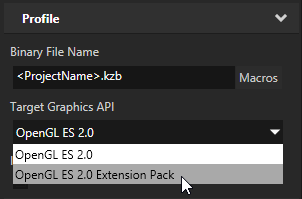
For example, set the Target Graphics API property to OpenGL ES 2.0 Extension Pack to use the RGBA float (16-bit) texture format.
| Magnification Filter Minification Filter | Mipmap Mode | ||
|---|---|---|---|
| Base mipmap | Nearest mipmap | Linear mipmap | |
| Nearest sample | Number of samples: 1 Uses the nearest pixel in the texture. This combination is equal to point sample. It returns the crudest result of all combinations and can cause aliasing when minified. Use this combination to get a very sharp result when magnifying the texture. | Number of samples: 1 Helps texture caching and helps reduce aliasing. However, it can produce a sharp transition when the texture is used on a flat surface. Use this combination when you want good performance and cannot afford better quality on your target platform. This combination is usually the fastest. | Number of samples: 2 Takes one sample from two mipmap levels and interpolates between those samples. Use this combination for special effects. For example, to implement the rim light effect. |
| Linear sample | Number of samples: 4 Interpolates between four nearest pixels in the texture. Use this combination to magnify gradients. However, do not use it for minification. | Number of samples: 4 Takes two samples from two mipmap levels and interpolates between these samples. Use this combination as the starting point. This combination is usually the best compromise between quality and performance. If you know there is no minification, you can set Mipmap Mode to Base. | Number of samples: 8 Takes four samples from two mipmap levels and interpolates between these samples. Use this combination when you want the best quality and your platform is powerful enough to effortlessly render the result. This combination has the largest negative impact on performance. |
